Perspective brings art to life by presenting a scene exactly as a viewer would see it in reality. This includes providing a focal point and adjusting the scale of the objects in the scene according to their distance from the viewer and proximity to the focal point. Students as young as elementary school age are capable of creating works with accurate perspective. Try these simple exercises to teach your students the art of one, two, and three point perspective.
Practicing One, Two, and Three Point Perspective
One Point Perspective
 1. Show your students several photographs of one point perspective—shots down a street, across a bridge, or in a hallway are great for demonstrating the decreasing size of the subjects as the get further away from the viewer. (Be sure to share “I’m There”, the one point perspective piece that graced the cover of our 2016 catalog. It was created by Minbio Yoo when he was a senior at Summer Creek High School in Houston, Texas.)
2. On large pieces of paper, have your students draw a horizon line in pencil horizontally across the center of their paper.
3. Now your students will make an “X” across the paper, beginning with a line from the upper left corner to the bottom right corner and ending with a line from the upper right corner to the bottom left corner. These diagonal lines should cross in the center of the horizontal horizon line.
4. Beginning on the left side of the page, have your students sketch a row of trees rooted on the diagonal line in the bottom right quadrant , with the tops of the trees roughly following the diagonal line in the upper right quadrant. The trees should decrease in size as they approach the center of the “X”. This is the vanishing point of the piece.
5. Repeat step 4 on the right side of the page.
6. Add detail to the bottom center portion of the page—students may choose to make this center a road with sidewalks on either side or perhaps a river with rocky banks on both sides.
7. Students may choose to add a setting sun or moon to the focal point area, and then add additional elements like cars, boats, people, clouds, birds, etc.
8. Finish the piece with color.
Two Point Perspective
 1. Find or take a photograph of building shot from its corner, so that the left and right walls of the building are both clearly visible. Share the shot with your students and discuss the lines of the image. The base of both side walls appear to move upward and horizontal, while the tops of each side wall appear to move downward and horizontal as they get further from the viewer. The two sides of the image lead the viewer’s eye to two different vanishing points. This is two point perspective.
2. Have your students recreate these angles. Start by drawing a horizontal line across the center of the page and a vertical line dissecting it, from the center of the top of the page to the center of the bottom. Then, starting at the edges of the page, erase an inch or two from each line. These are your vanishing points.
3. Using a ruler, draw lines connecting the top of the vertical line to the left end of the horizontal line, the left edge of the horizontal line to the bottom end of the vertical line, the bottom end of the vertical line to the right end of the horizontal line. Your page should now show a diamond shape.
4. Sketch the details of the building from your photograph, reminding students that details should get smaller the further away they get from the corner of the building and the closer they get to the vanishing points. In other words, details nearer the center of the page should be larger than those toward the sides of the page.
5. Challenge your students to add a few people, making sure that those near the center of the page are larger than those on the sides.
Three Point Perspective
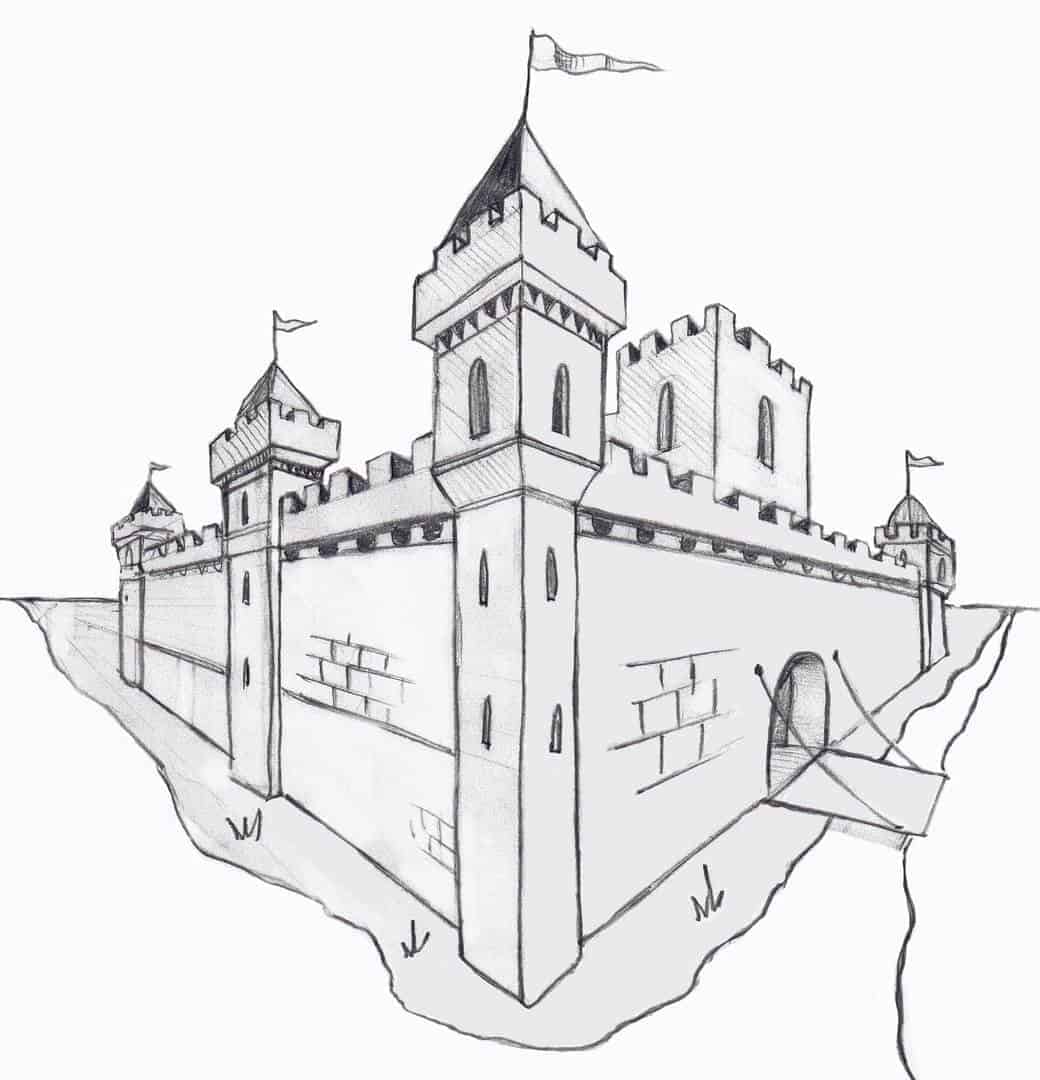
 1. Three point perspective occurs when the viewer is looking up or down on a scene, versus seeing the scene at eye level, as in one and two point perspective. Share some photos with your students that demonstrate three point perspective. Point out the two vanishing points on the horizon; then challenge them to find the third vanishing point. It will either be above the horizon line or below it. Show your students the triangle created by the three vanishing points.
2. Students will begin by drawing a horizontal line that is higher than the center of the page (centered between the top of the page and the natural center works well) that extends nearly to the left and right edges of the page, but not quite all the way.
3. Next, students will place a dot somewhere near the bottom center of the page. Using a ruler, have students connect the ends of the horizon line to the dot, forming a triangle on the page.
4. Now students may begin to rough in the elements of their scenes within the triangle, keeping in mind that extending the lines of any one of the elements must lead to one of the three vanishing points, or corners of their triangle.
5. Add final detail to the each of the elements in the scene.
More Art Skills Blogs
Looking for more basic art skills overviews and tips? Check out all the other blogs in the Art 101 Series and gather your creativity for the next art project or lesson plan.
Have you had success teaching your students perspective drawing? What is your favorite subject or scene for teaching three point perspective? Let us know in the comments below.
The post Perspective 101 appeared first on Schoolyard Blog | Teacher Resources | School Specialty.