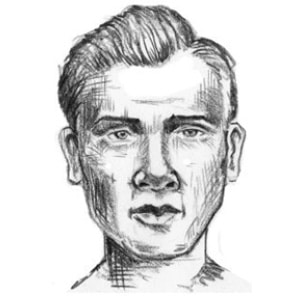
There’s almost nothing more rewarding than drawing a great face (unless it’s drawing great hands, but that’s for another post). Your students will delight in creating a life-like head and it’s really not that difficult. In fact, we’ve broken it down for you in a few simple steps:
To Draw Front View
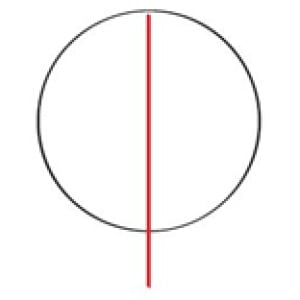
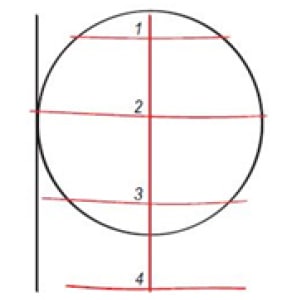
1. Draw a circle. Add a vertical line down the center, extending beyond the bottom of the circle, as shown below.
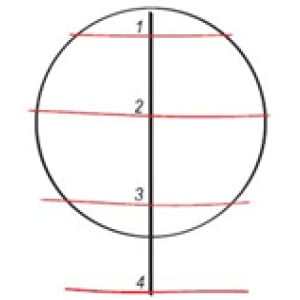
2. Beginning at the hairline (just below the top of the circle), sketch four horizontal lines, creating three equal sections. The bottom section will extend beyond the circle.
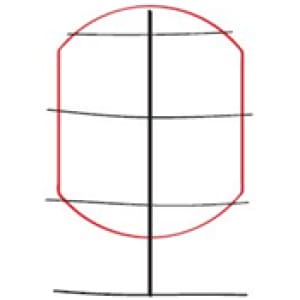
3. Since heads aren’t actually round, flatten the sides out to create the flat, planed sides of the head.
4. Now it’s time to add your features:
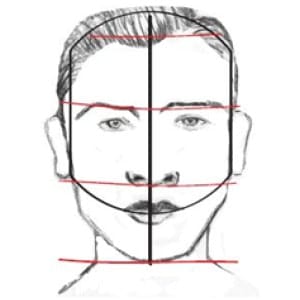
a. Sketch in the hairline around the top line.
b. Add the brow line, beginning at the second line. The brows extend all the way to the flat side planes, beginning their downward curve at the start of the flat planes.
c. Sketch the bottom of the nose at the third line. The nose fills the area between lines 2 and 3, with the top of the bridge beginning at the second line and the bottom of the nostrils ending at the third. The underside of the nose is a triangle shape, and remember that the nostrils are wider than the bridge.
d. Add the ears – they fill the same space as the nose, but on the sides of the head (obviously).
e. The eyes are just below the brow line, with the inside of each eye shape beginning on the same vertical line as the outside edge of the nostril.
f. The top of the mouth begins a third of the way between lines 3 and 4. The left side of the mouth begins below the center of the left eye and extends below the center of the right eye.
g. The chin ends at the bottom line. Follow the flattened side planes of the face to form a chin according to your desired jaw shape (round, square, etc)..
h. Add a neck.
5. Add shading to define the planes and add detail to complete your face.
To Draw a Profile
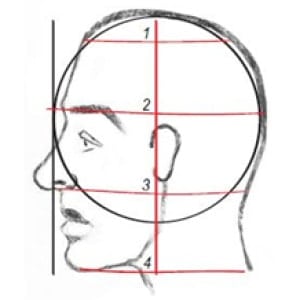
1. Follow steps 1 and 2 above.
2. The ear fits between lines 2 and 3, beginning behind the center vertical line.
3. Follow the feature proportions above, with the features extending beyond the circle to one side or the other.
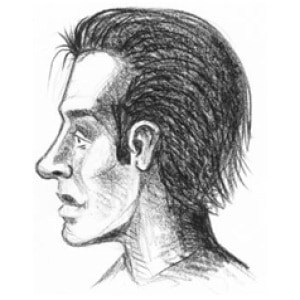
4. Complete with detail and shading.
Have you taught your students how to draw faces? Do you have any tips or tricks to share with your fellow art teachers? Let us know in the comments below.
The post Drawing Faces 101 appeared first on Schoolyard Blog | Teacher Resources | School Specialty.